
Add Custom Icon to DigitalOcean Diagram in AI Line Studio: A Step-by-Step Tutorial
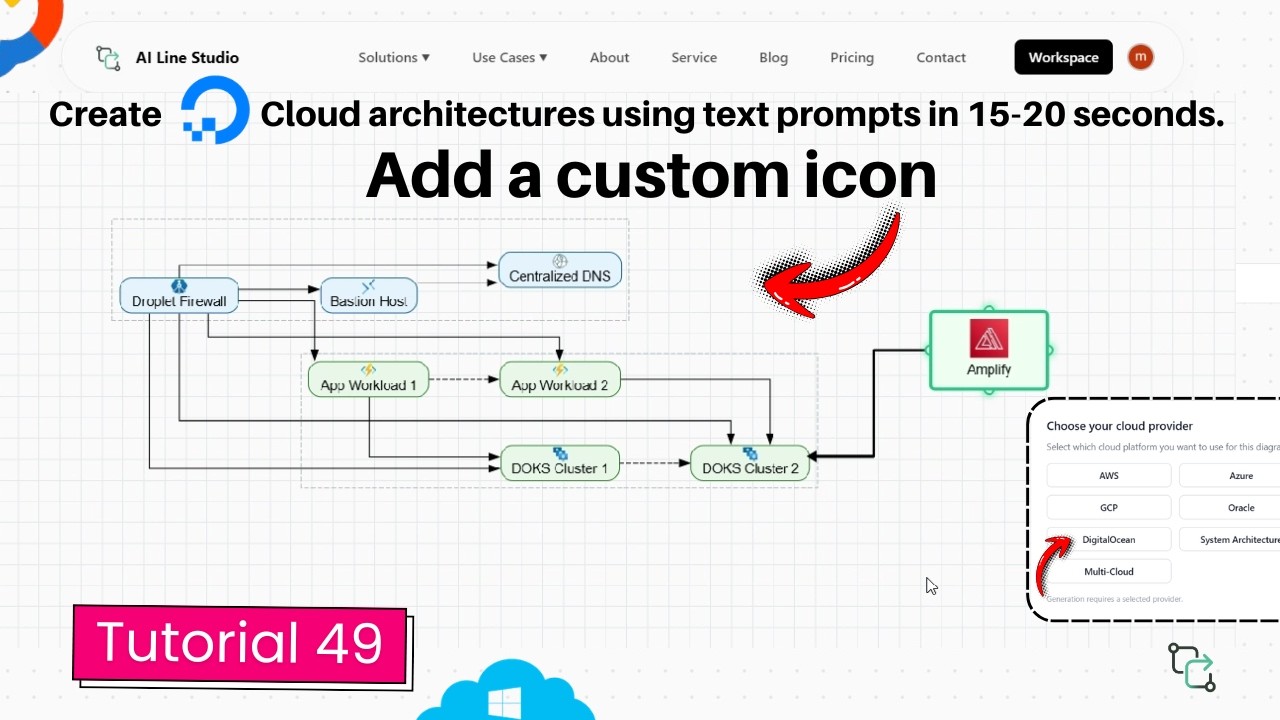
You can add custom icon to DigitalOcean diagram in AI Line Studio by opening the Icons menu, dragging your chosen icon onto the canvas, and connecting it to any existing node with a single click-and-drag. This is Tutorial 49, walking through the full workflow on a pre-generated AI Line Studio DigitalOcean multi-VPC hub-and-spoke architecture, showing how custom icons make your cloud diagrams more detailed and visually rich.
YouTube Tutorial
AI Line Studio Tutorial 49: Add Custom Icon to DigitalOcean Diagram
Why Add Custom Icon to DigitalOcean Diagram in AI Line Studio
Cloud architecture diagrams are only useful when they tell the complete story. Standard provider icons cover compute, storage, and networking, but real-world systems include third-party services, legacy components, or internal tools that do not have a default icon in the library. Adding a custom icon solves that gap. It lets you represent any component, whether it is a custom API gateway, an on-premise bridge, or a partner integration, directly on the same canvas as your DigitalOcean resources.
The result is a single, unified diagram that stakeholders can read without mental translation. A system architect does not need to maintain a separate legend for off-platform services. A DevOps lead can show exactly where a custom monitoring agent sits in the stack. The diagram becomes the source of truth, not a partial representation that requires footnotes.
Generating the Base DigitalOcean Diagram
Start by registering on the platform. Once your account is set up, you land on the Workspace page. From there, click on the "Cloud Architecture" feature, which redirects you to the page where you select your cloud provider. Choose DigitalOcean.
For this tutorial, the presenter uses an already generated diagram representing a multi-VPC hub-and-spoke architecture in DigitalOcean. Enter a prompt describing that topology and the tool automatically builds the completed diagram on the canvas in roughly 15 to 20 seconds. A multi-VPC hub-and-spoke layout typically includes a central hub VPC with shared resources and multiple spoke VPCs that connect back to it, with networking components drawing the connections between them.
If you are unsure how to phrase your prompt, the input guide covers how to write prompts for diagrams that produce clean, accurate outputs on the first try. Because the cloud architecture diagram generator builds the foundation in under half a minute, most of your time goes toward reviewing and customizing the output, not manually placing Droplets, VPCs, and load balancers by hand.
Adding a Custom Icon to Your Diagram
Once the base diagram is ready, locate the header menu and click on the Icons button. A menu opens from which you can select an icon and simply drag and drop it onto the canvas. The icon library includes shapes and symbols that go beyond standard DigitalOcean service icons, giving you flexibility to represent anything that sits inside or alongside your cloud environment.
After dropping the icon, you can close the icons panel and place the custom icon anywhere you prefer on the workspace canvas. There is no grid-locking or forced alignment that fights your layout intent. The icon stays where you put it, which matters when you are building a diagram that needs to communicate spatial relationships, such as showing a third-party service sitting outside the primary VPC boundary.
Connecting the Custom Icon to Existing Components
An icon on its own is just a shape. The value comes from showing how it relates to the rest of the architecture. To link the custom icon to an existing component in your diagram, click on the custom icon, which highlights it in green. Then click and drag a connection line from the highlighted icon to the desired existing node. The line snaps into place, creating a visual relationship that is just as clear as any native DigitalOcean connection.
This matters for architecture diagrams that need to show dependencies across boundaries. A custom monitoring agent that lives outside the VPC but polls resources inside it. A partner API that your Droplets call but that runs on a different provider. An on-premise database that replicates to a DigitalOcean managed cluster. All of these relationships become visible and explicit when you can drop a custom icon and wire it into the existing topology.
When to Use Custom Icons in DigitalOcean Diagrams
Custom icons are not a gimmick. They solve specific communication problems that standard icon sets cannot address. Use them when you need to represent a service that does not have a native DigitalOcean equivalent, such as a third-party CDN, an external identity provider, or a legacy mainframe that still feeds data into your cloud environment. Use them when you want to highlight a component that spans multiple providers, making it clear that the service is not tied to a single region or platform.
They are also useful for internal documentation. A software engineer might adopt a custom icon to represent a platform-wide load balancer or a shared caching layer that every project uses. Standardizing that icon across all DigitalOcean diagrams creates visual consistency, so anyone reading the document recognizes the component instantly without reading labels.
The platform's core motto is "stop drawing, start explaining." Custom icons extend that philosophy. Instead of drawing a generic rectangle and adding a text label, you drop a purpose-built icon and connect it. The diagram communicates faster, looks more professional, and requires less explanation in meetings or documentation.
Key Takeaways
- To add custom icon to DigitalOcean diagram in AI Line Studio, open the Icons menu from the header, drag and drop your chosen icon onto the canvas, and position it anywhere you prefer.
- Connect a custom icon to an existing node by clicking the icon, it highlights in green, then dragging a connection line to the desired component.
- The base DigitalOcean diagram generates in roughly 15 to 20 seconds after selecting DigitalOcean as your cloud provider and entering a prompt like a multi-VPC hub-and-spoke architecture.
- Custom icons represent third-party services, legacy components, or internal tools that do not have native DigitalOcean equivalents, making diagrams more complete.
- Using custom icons turns generic labeled shapes into purpose-built visual elements that communicate faster and look more professional.
Ready to make your DigitalOcean diagrams more complete and visually rich?
Try it free and add your first custom icon in under a minute.
Try It FreeFrequently Asked Questions
Generate your base diagram first by selecting Cloud Architecture in the Workspace and choosing DigitalOcean as your provider. Then click the Icons button in the header menu, select an icon, and drag and drop it onto the canvas. You can place it anywhere and close the icons panel when finished.